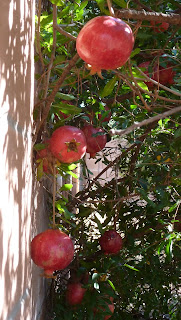
Remember that few tablespoons I told
you to put aside in my peeling and juicing pomegranates post? (Located in
this post) We're
going to use that today! Woohoo!
We're going to be making soap!
Soap is something that is really
customizable based off of the creator's (or recipient’s) desires,
so feel free to play around and experiment!
Pulp, fresh fruit, ETC does work better
with cold process soap, but due to household restrictions for me and
for the sake of simplicity for others, we're going to be doing a
glycerin soap.
The first step to making this soap is
going to be to dry out the pulp itself, otherwise you'll risk having
moldy soap in a few days as the moist pulp begins to decay and rot
(yuck). So, unless you're going to use the soap up in a few days and
store it in the fridge, you need to dry the pulp out.
To dry out your pomegranate pulp, you
will need:
Pomegranate Pulp
Spoon
Oven
Cookie sheet
Butcher paper/wax paper
Optional:
Cookie cooling rack
Aluminum Foil
Step one:
Heat your oven to 200 degrees
Fahrenheit.
Step two:
If you have a cookie cooling rack,
place it on top of your cookie sheet to elevate the pulp. If you have
foil too, use it to line the cookie sheet and place the wax paper
onto the cooling rack.
If you are not using the cookie cooling
rack, line your cookie sheet with wax paper.
Step three:
Using your spoon, evenly spread the
pulp over the wax paper, making it as thin as possible, and place the
cookie sheet into the oven. Remove when the pulp has been dried out.
(The small amount you see me using took a little over 4 hours to be
finished.)
Alright, now that our pulp is dried out
and ready, let's get to work making that soap!
You will need:
1 LBS of glycerin melt and pour soap.
Dried Pomegranate Pulp
Coffee Grinder (or something you can
grind with)
Cheese Grater (or knife)
Heat resistant bowl
Pot with water or microwave
Spoon or spatula (silicone spatula
recommended)
Mold of some kind (muffin pan, bread
pan, stepping stone mold, cup, ETC. Get creative)
Optional (all measurements are for 1
LBS of soap):
1 Tablespoon Olive Oil, Honey, Shea
Butter, Cocoa Butter, Coconut Oil, Oatmeal or whatever else you like.
15 to 30 drops of essential oil of your
choosing
Soap dye
Ladle
Anything else you fancy in soap.
Step one:
Use your coffee grinder (or whatever
you're using to grind) to grind up your pomegranate pulp. You need to
grind up the pulp into a finer consistency because it will be too
rough for your skin as is.
 |
| I accidentally burned this batch of pulp when drying it a bit :( Oh well... |
Note: This dried pulp will not add any
sort of a fragrance to the soap and may add only minimal color, if
any. It will solely be serving as a light exfoliating touch to your
soap and a way to use up more of your pomegranates.
 |
| PJ time! <3 |
Step two:
Using the cheese grater, grate up your
melt and pour soap so it will melt more evenly. If you do not have a
cheese grater (or don't want to use yours), you can chop up the soap
into smaller chunks.
Step three:
Two options:
You can melt down your soap inside your
microwave, doing it in 30 second intervals and stirring between each
until completely melted.
Or you can place your pot with water on
your stove and place your heat resistant bowl over it to create a
make shift double boiler to melt down your soap (you could also use a
pot instead, I prefer the bowl since I have my grater soap in there
anyway). I prefer this method because it allows me to take more time
with adding ingredients into my soap without the soap starting to
cool.
Step four:
Once your soap is melted, add in 1
tablespoons of your ground up pomegranate pulp and anything else
you'd like to add. Mix well.
(I chose to add a few drops of red soap
dye, about 20 drops of rose essential oil, and 1 tablespoon of extra
virgin olive oil to my soap.)
Step five:
 |
| My mold is a silicone muffin tray! |
Once you've added everything you wanted
in your soap and mixed well, go ahead and pour it into your mold. How
many bars you get will depend on the mold you use and how you cut it
(if cutting is required) later.
Allow it to cool and set. This can take
about an hour, but may take longer for larger batches.
Tip: Sometimes the pomegranate pulp
will all settle to the bottom. If it does this, pour your soap in
layers instead. Pour one layer, wait 30 seconds to 1 min, sprinkle
some extra pulp over it, pour the next layer, wait, and so on.
Step six:
Once cooled and set, remove from molds
and wrap or store however you like.
Enjoy!


 Add in your pomegranate molasses and
begin to stir thoroughly. The molasses will get clumpy and be a pain
initially, but it soon spreads out and you'll find that you coat all
the sugar very nicely. This will take a few minutes.


